
I’m sharing with all of you my classic Ube Halaya recipe inspired by my mom’s version that’s rich, creamy, and perfectly sweet. Great for all your dessert needs, such as in pastries and baked goods -this version is so much better than store-bought!
Recipe Rundown
Method
To make this traditional Ube Halaya, simply combine all the ingredients into a large pot and constantly mix until it thickens into glossy, jam-like consistency.
Ingredients
This recipe uses 7 ingredients: fresh ube, evaporated milk, coconut milk, condensed milk, butter, ube extract, and just a pinch of salt!
Uses
You can use this for my ube champorado, ube pie, and/or Halo-Halo recipes! This is also great for spreading on pastries, as a base for baked goods, drinks, or simply just eating by the spoonful.
Quick Tips
You can adjust the ratio of the condensed milk (more or less) to better suit how sweet you’d like it to be. To make the most smoothest ube halaya, you can also blend the mixture prior to cooking to break up any fibrous strands.
I love ube. In fact, a majority of Filipinos do and we take huge pride in our native crop!
Ube is a Filipino yam with a distinct, vibrant purple color. It’s similar in tastes to taro, with a deeper, nuttier, somewhat vanilla-y, floral taste.

Ube halaya processes that ube down into a concentrated jam, perfect for spreading on top of bread, pastries, or as a base for desserts or frostings.
My mom always makes fresh halaya and stores it in the fridge so that the whole family can snack on it using a spoon!
Some of our favorite ways to use halaya is to turn it into ube cake (the ube frosting tastes phenomenal with this), mix it in with Halo Halo on hot days, or to make a warm, comforting bowl of Ube Champorado.

Ube: A Short Guide
Let’s talk ube! This is a short guide that I quickly put together to address some concerns from readers over the past year.
*Since writing this, I’ve now posted an in-depth master guide to ube going over how to prepare its various types (fresh, frozen, powdered, etc.) which you can find here!
Fresh vs. Frozen
Like the recipe mentions, both can be used for this recipe. Frozen may be more accessible and easier to find for most folks in the West, though fresh ube is definitely more tasty.
- If using fresh: You’ll need to cook it first until fork-tender (either via boiling, steaming, or baking for 45-60 mins at 400F), then grate it finely before turning it into halaya.
- If using frozen: These already come pre-grated and can be found in the frozen section in most Filipino or Asian groceries. Let them thaw adequately in the fridge or submerged in cold water prior to using in the recipe. Unlike fresh ube, frozen ube typically already comes pre-cooked, so they’re readily usable for this recipe!
Is it really ube?
I’ll be straight to the point -if it’s not ube you’re using, then you’re not making ube halaya, it’s just a tasty sweet potato jam.
Some recipes online will have you substitute ube with taro or Japanese sweet potatoes, but seriously, just because it’s purple, it doesn’t make it ube! If you can’t find fresh ube, then your next best choice is to go for the frozen ube.
Remember that ube is a yam and not a potato, so apart from names, you can also use some visual cues to discern whether something is truly ube or not.
Ube has a very “rooty” look to it (similar to tree bark); with thick, rough skin and almost hairy-looking. Sweet potatoes tend to have thinner, smoother skin.


Okay, but enough with being a purist, unless you did want to try experimenting with purple potatoes, then feel free to do so. While this wouldn’t technically be an ube halaya, I’m confident it would still taste great.
Ingredients
Ube: You can use fresh or frozen ube for this recipe. Both can be found in most Filipino groceries, or in some Asian markets (specifically those specializing in Southeast Asian products).
- Substitutes: If you can’t find the fresh or frozen kinds, the powdered ube may also work -you’d simply just need to rehydrate the powder (instructions should be in the back of the packet) and mix it along with the rest of the ingredients in this recipe.
Evaporated milk: This milk is a tad thicker and creamier than standard fresh milk. It will give added richness to our halaya.
- Substitutes: Fresh milk may also work, though it may not taste as rich and/or deep milky in taste.
Butter: Be sure to use the unsalted butter so you have better control on the overall flavor of the dessert.
- Substitutes: You may also use margarine, which is much more common in the Philippines. Otherwise, butter can be omitted entirely without altering the flavor of the dessert too much.
Coconut milk: Coconut and ube are one of the best tropical pairings since their flavors just complement each other perfectly!
- Substitutes: Fresh milk can be used as a replacement.
Condensed milk: This will intensify the richness and milky taste of the halaya. Feel free to adjust the amount of condensed milk in the recipe to better suit how sweet you’d like it to be.
- Substitutes: White or brown sugar may also be used for this recipe, though it may not be as rich or milky in flavor.
Ube extract: This is technically optional, but I do like to add it to all my halaya recipes as it not only helps to intensify the ube flavor, but it also deepens its vibrant purple color.
Salt: A pinch of salt will enhance the flavor and sweetness of our dessert.

Instructions
Melt the butter over medium heat until browned and foamy (take care not to burn the butter or the halaya will become bitter).

Add in the evaporated milk, coconut milk, and grated ube. Stir to combine.

Optional, but highly recommended: blend this mixture until smooth to break down any large clumps of ube. This will ensure a smoother jam with a less grainy texture.

Add in the condensed milk, ube extract, and salt. Stir to combine.

Continue stirring for 40-45 minutes over medium heat, being sure to scrape the sides and bottom of the pan. You’ll know it’s done when the halaya no longer sticks to the pan when mixed.
Taste the halaya. Add more condensed milk, if needed, to reach your desired sweetness.

Remove from the heat and let cool completely in a separate container.

Cooking Tips
Use a blender for the smoothest texture: While not exactly essential, you can use a blender to ensure your ube mixture is the smoothest it can be. This might be helpful if you’re finding that your ube has a lot of fibrous strands that aren’t quite broken/mashed up.
Adjust the sugar to taste: How sweet the halaya should be depends on your preference. Feel free to adjust the amount of condensed milk in the recipe to ensure it’s to the sweetness that you like.
Adjust the cooking time accordingly: While traditional ube halaya is typically thicker than the standard spreadable jams, you can easily control its consistency by adjusting the cooking times.
The rationale behind this is that the longer you cook the halaya, the more moisture/water you’re evaporating out of the mixture, resulting with a thicker outcome.
- Thinner: If you prefer your halaya to be more on the runnier, thinner side (similar to spreadable jam), go for around 30 minutes.
- Traditional: The sweet spot for traditional ube halaya is around 45 minutes. It gives the halaya a firm texture when cooled, yet it’s soft enough to be spreadable.
- Solid: For a solid halaya, similar to the texture of firm pudding, cook for around 60 minutes. You can place the halaya in molds to take on the shape and serve as-is.
FAQs (Frequently Asked Questions)
How long does this last?
Ube halaya is best enjoyed within 5 days, but it should last for up to one week refrigerated in an airtight container.
You can also freeze this for up to 2-3 months. Just be sure to defrost it in cold water or in the refrigerator overnight prior to consuming for optimal texture.
Some readers mentioned that frozen halaya can actually last longer (we’re talking up to 6 months). I haven’t personally gone that long, but always follow general food safety precautions. Keep an eye out for your ube: if it starts to become discoloured or it has any funny smells or tastes, then it’s probably no good and you should discard it.
How do I use Ube Halaya?
Think of this as a jam or a concentrated ube that you can use for a multitude of other recipes.
Some recipes where you can this include: Ube Champorado, Ube Pie, or Halo Halo.
You can also use it in general for:
- Spreads or toppings for breads and pastries (e.g., croissants, biscuits, pancakes, waffles, etc.)
- As a base for icing/frosting cakes, brownies, macarons, etc.
- As a base for flavoring drinks.
- Eating by itself from a spoon (my preferred method)
How do I serve this?
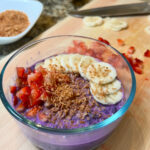
If you don’t plan on using the halaya for any other dish, you can serve the halaya on its own by traditionally sprinkling on top some latik (toasted coconut curds) or grated processed cheese (e.g., Eden or quick melt cheese).
You may also try garnishing it with toasted coconut shreds for a crunchy, textural option.
Looking for more tasty dessert ideas? Here’s a couple that you might enjoy:

Ube Halaya (Ube Jam)
Course: Dessert, SnacksCuisine: Philippines4-5
cups worth of Ube HalayaI’m sharing with all of you my classic Ube Halaya recipe inspired by my mom’s version that’s rich, creamy, and perfectly sweet. Great for all your dessert needs, such as in pastries and baked goods -this version is so much better than store-bought!
Keep the screen of your device on
Ingredients
2 tbsp unsalted butter
1 cup evaporated milk
1 cup coconut milk
~455 g grated ube (fresh or frozen ube can work -see notes)1
1.5 cup condensed milk (more or less, depending on your preference)
1 tsp ube extract
1/4 tsp salt
Directions
- Melt the butter over medium heat until browned and foamy (take care not to burn the butter or the halaya will become bitter).
- Add in the evaporated milk, coconut milk, and grated ube. Stir to combine.
Optional, but highly recommended: blend this mixture until smooth to break down any large clumps of ube. This will ensure a smoother jam with a less grainy texture. - Add in the condensed milk, ube extract, and salt. Stir to combine.
- Continue stirring for 40-45 minutes over medium heat, being sure to scrape the sides and bottom of the pan. You’ll know it’s done when the halaya no longer sticks to the pan when mixed2.
- Taste the halaya. Add more condensed milk, if needed, to reach your desired sweetness.
- Remove from the heat and let cool completely in a separate container3.
Notes
- 1. You can use fresh or frozen ube for this recipe. Both can be found in most Filipino groceries, or in some Asian markets (specifically those specializing in Southeast Asian products). If you plan to use fresh, you’d need to cook it first until fork-tender (either via boiling, steaming, or baking for 45-60 mins at 400F), then grate it finely before turning into halaya. Frozen, grated ube typically already come pre-cooked, so they’re readily usable for this recipe. I’ve written an in-depth guide on ube here, which goes over how to prepare the various types of ube (fresh, frozen, powdered, etc.). If you can’t find the fresh or frozen kinds, the powdered ube may also work -you’d simply just need to rehydrate the powder (instructions should be in the back of the packet) and mix it along with the rest of the ingredients in this recipe.
- 2. You can adjust the cooking time accordingly. While traditional ube halaya is typically thicker than the standard spreadable jams, you can easily control its consistency by adjusting the cooking times. The rationale behind this is that the longer you cook the halaya, the more moisture/water you’re evaporating out of the mixture, resulting with a thicker outcome.
Thinner: If you prefer your halaya to be more on the runnier, thinner side (similar to spreadable jam), go for around 30 minutes.
Traditional: The sweet spot for traditional ube halaya is around 45 minutes. It gives the halaya a firm texture when cooled, yet it’s soft enough to be spreadable.
Solid: For a solid halaya, similar to the texture of firm pudding, cook for around 60 minutes. You can place the halaya in molds to take on the shape and serve as-is. - 3. If you don’t plan on using the halaya for any other dish, you can serve the halaya on its own by traditionally sprinkling on top some latik (toasted coconut curds) or grated processed cheese (e.g., Eden or quick melt cheese). You may also try garnishing it with toasted coconut shreds for a crunchy, textural option.
- Storage: Ube halaya is best enjoyed within 5 days, but it should last for up to one week refrigerated in an airtight container. You can also freeze this for up to 2-3 months. Just be sure to defrost it in cold water or in the refrigerator overnight prior to consuming for optimal texture.
Like this recipe?
Follow @Iankewks on Pinterest
Join our Facebook Group!
Follow Iankewks on Facebook
Disclosure: Some links on this page are affiliate links, meaning that at no additional cost to you, we may receive compensation from purchases made through these links. As an Amazon Associate, I can earn from qualifying purchases.


)
Pingback: Ube Champorado (Sweet Ube Rice Porridge) | Iankewks
Pingback: Ube Pie (Jollibee copycat) | Iankewks
Pingback: Halo-Halo (Filipino Shaved Ice Dessert) | Iankewks
Pingback: Our Best Filipino Desserts - The Kitchen Everything
I have made use jam on several other occasions for cookies for my grand children. ( I am half Filipino and make Pancit and Lumpia! Not much else.). This batch is a little softer..even after one hour. Should I have put in more of the grated cube instead of one cup that you have here… in grams? I just took it off the stove and will see if it hardens more. The consistency is a soft jam…I will try to use in cookies tomorrow. Thanks!